今更だけどInstantiateメソッドについてまとめる。参考記事がかなりまとまっているので一度チェックしてからこちらも見てほしい。
Instantiateメソッドを調べる
そもそもInstantiateメソッドとは何かと言えばプレハブ化したオブジェクトをインスタンス化する時に使うメソッドだ。
プレハブの概念を理解していない人はまずググって理解しよう。
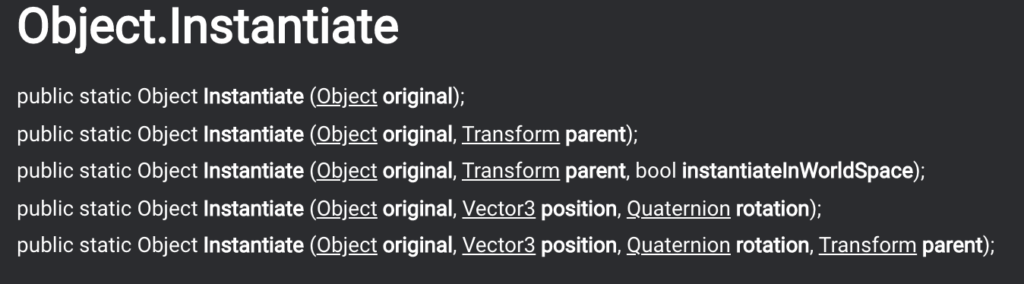
今まで雰囲気でInstantiateメソッドを使ってきたが、あらためて公式を見てみるとInstantiateメソッドが5つもある。
同じ関数名だけど、引数をいくつ入れるかが違うものをオーバーロードというので知らなかった人は頭の片隅にでも入れておこう。
ひとつずつ見ていきたい。
オブジェクトを作成しプレハブ化する
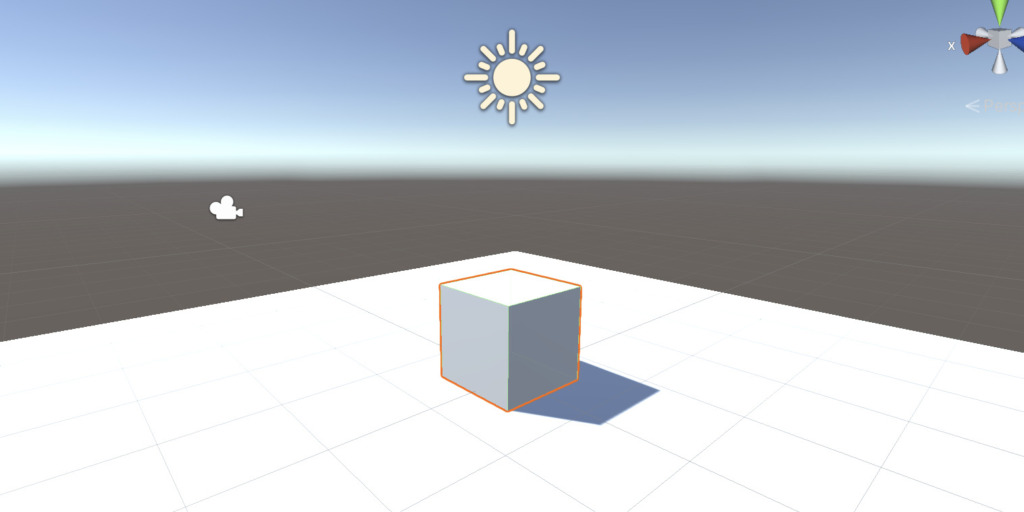
まずは準備として適当にプロジェクトを作成する。
Instantiateメソッドを使用する為には、プレハブ化するオブジェクトをまず用意する。
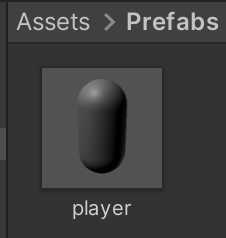
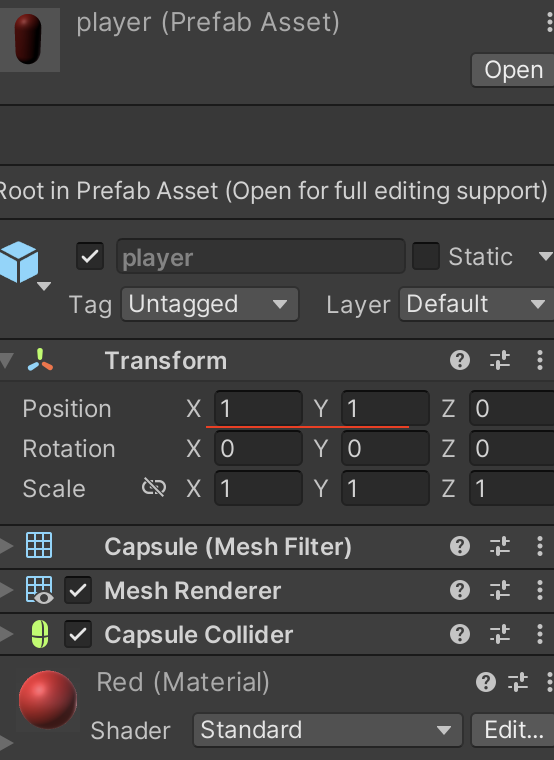
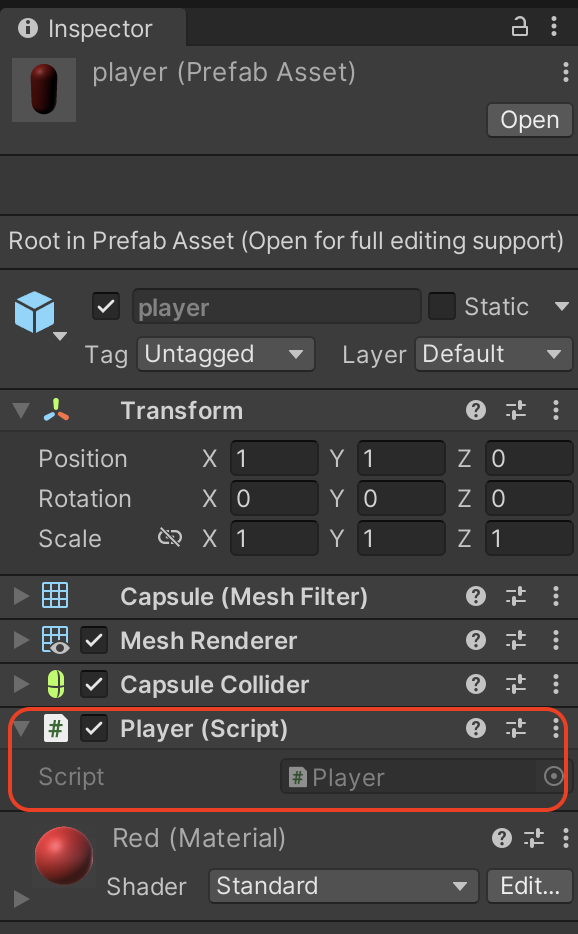
適当にオブジェクトを作成したらそれをプレハブ化しておこう。今回自分は適当なカプセルを作ってそれをプレハブ化した。
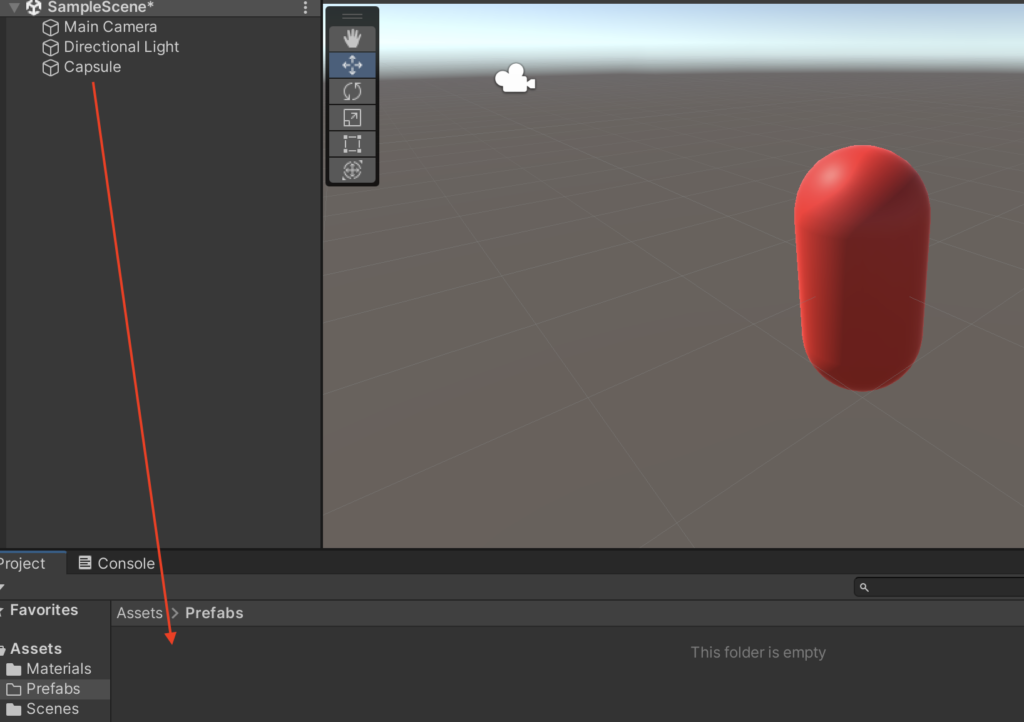
次に、プレハブ化したカプセルを生成するためのフィールドを作成した。これは単にカプセルがどの場所に表示されるか見たいための基準として作成しただけなので生成しなくてもよい。

とりあえずこれで簡単な準備完了。Instantiateメソッドについて1つずつみていこう。
①Instantiate(object)
まず最初は一番シンプルなもの。引数としてプレハブを渡すものだ。

生成する為のスクリプトと空のゲームオブジェクトを作成していく。
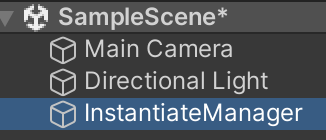
以下のスクリプトを作成したら、空のゲームオブジェクトにアタッチしよう。
using System.Collections;
using System.Collections.Generic;
using UnityEngine;

public class InstantiateManager : MonoBehaviour
{
    //インスタンスを管理するクラス

    //プレハブをいれる
    public GameObject player;

    void Start()
    {
        Instantiate(player);
    }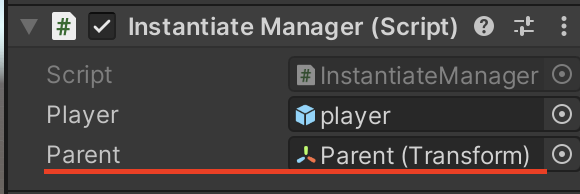
}スクリプトの中で、public GameObject player;とplayerプレハブを受け取る。インスペクタからプレハブを設定しておく。
引数にはObject型をとるので基本的には何入れても良いと思うが、とりあえずGameObject型にしておいた。
その後、Instantiate(player);でプレハブをインスタンス化した。
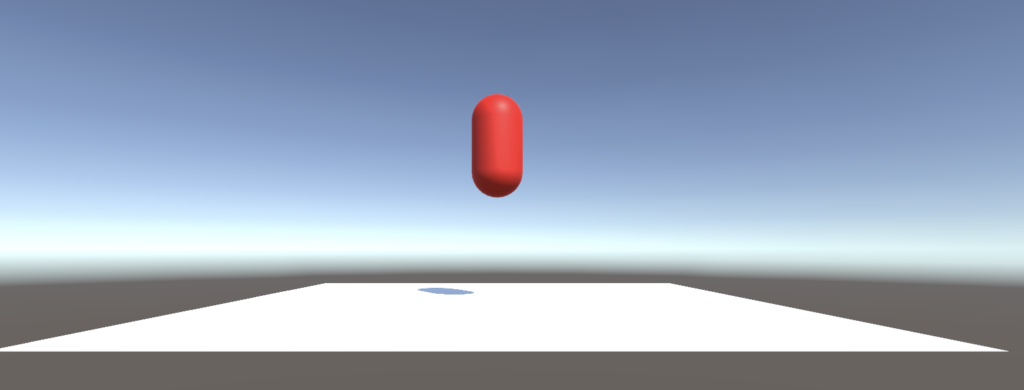
これを再生してみると以下のようになる。

どの場所に生成されるかは、PrefabのTransformによって変わる。
元のPrefabのTransformを変更して、再度再生してみる。
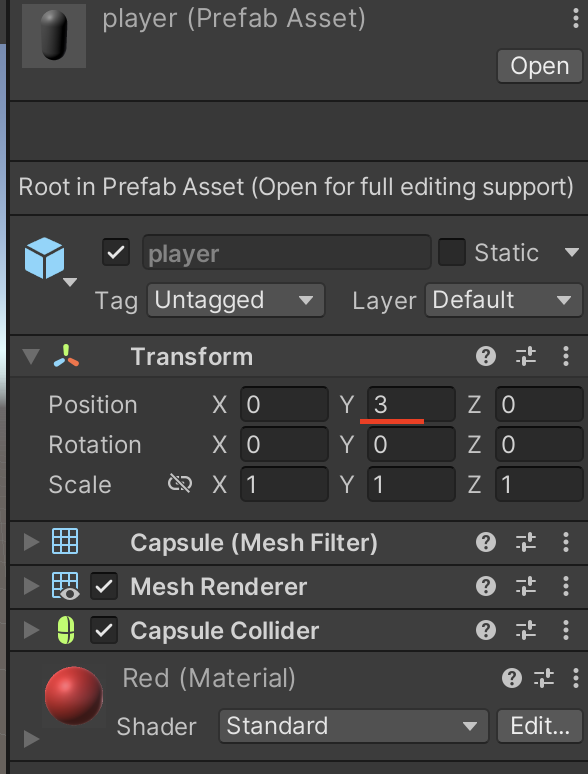
単純なInstantiateメソッドはPrefab基準で位置が変更されることを覚えておこう。
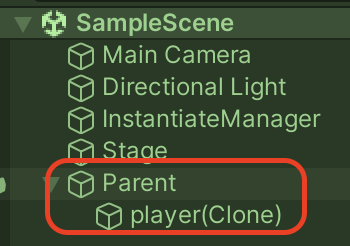
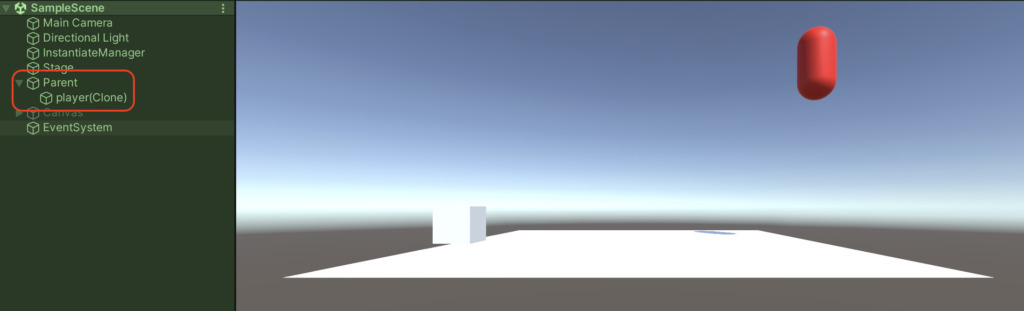
②Instantiate(object,parent)
次は、生成するインスタンスを指定した親の子に配置するメソッド

わかりやすくする為に親オブジェクトを作成しておく。
スクリプトを書き換えてインスペクタから親オブジェクトを設定して再生してみよう。
using System.Collections;
using System.Collections.Generic;
using UnityEngine;

public class InstantiateManager : MonoBehaviour
{
    //インスタンスを管理するクラス

    public GameObject player;
    public Transform parent; //親はTransform型

    void Start()
    {
        Instantiate(player,parent);
    }
}
注意しなければならないのは、Instantiateメソッドの第二引数に入れるのはTransform型なので、Transform型を指定しよう。
public Transform parent;の部分で、Transform型で宣言する。
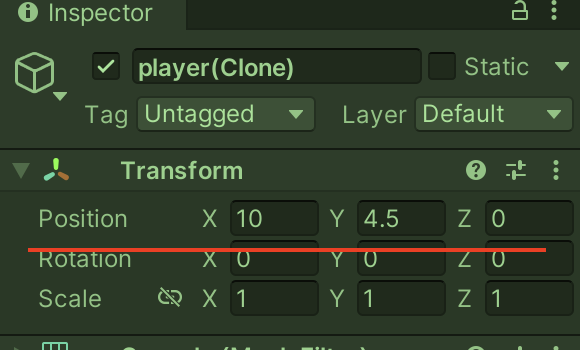
わかりやすいように生成するカプセルのTransformを変更して再生してみた。
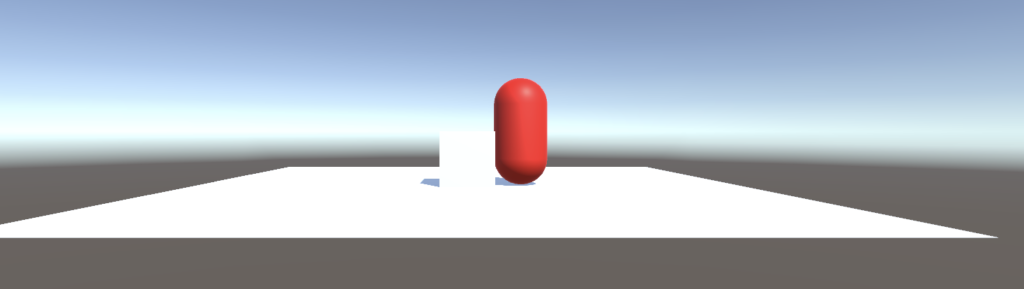
一見、普通のInstantiateと何が違うのかと思うかもしれないが、生成されたオブジェクトは親の子に入る。つまり、親の位置が変更されると子の位置も一緒に動くのだ。
UIでも試してみる
UIの場合はRectTransformを指定すればOKだ。むしろUIの場合は親を指定しないとCanvasの外にUIが生成されてしまうのでしっかり指定しよう。
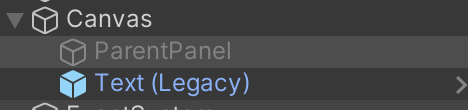
UIのPanelとテキストを作成する。
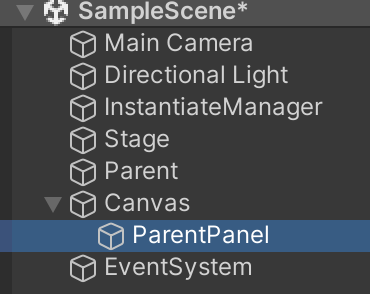
テキストオブジェクトを作成して、これをプレハブ化する。Instantiateメソッドで上で作成したパネルの子オブジェクトとして生成したい。
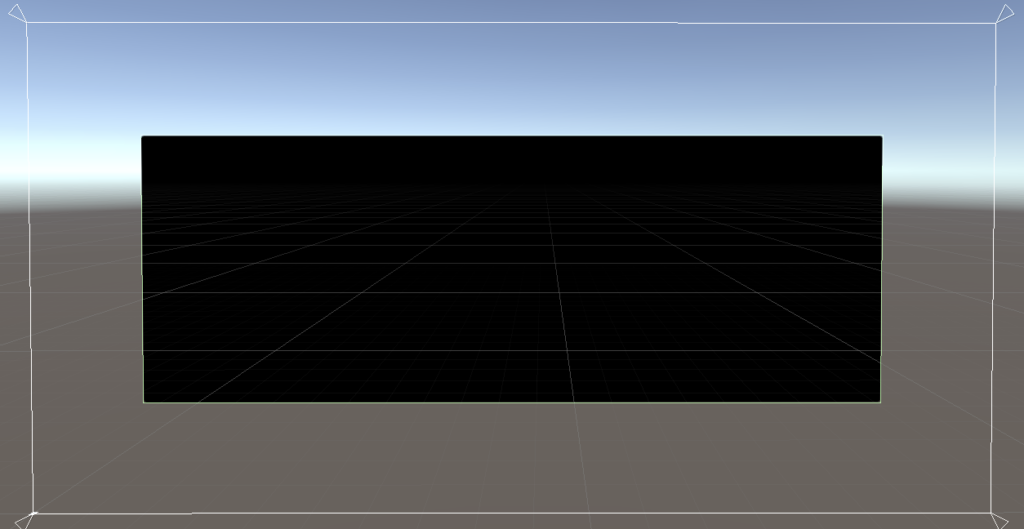
まずは引数に親を指定しないでInstantiateしてみる。以下のスクリプトに書き換えて再生してみよう。
using System.Collections;
using System.Collections.Generic;
using UnityEngine;
//インスタンスを管理するクラス
public class InstantiateManager : MonoBehaviour
{
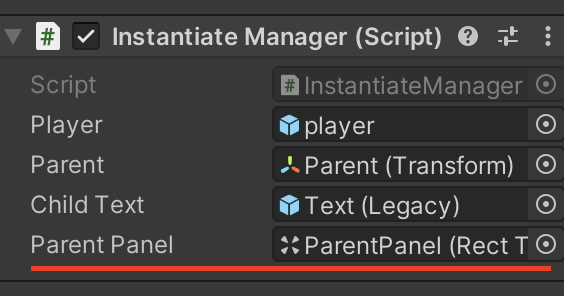
public GameObject player;
public Transform parent;
//UI
public GameObject childText;
public RectTransform parentPanel;
void Start()
{
//子テキストの生成 引数に親を指定していない場合
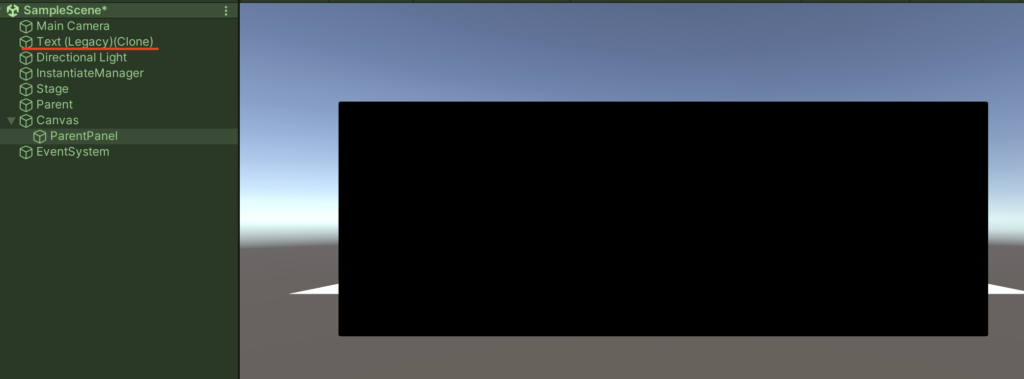
Instantiate(childText);
}
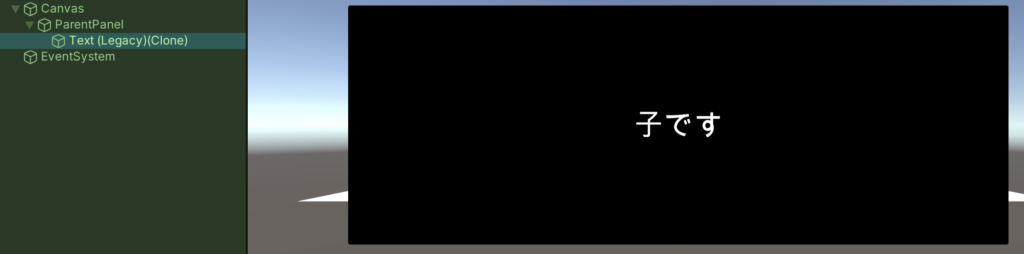
}すると、テキストオブジェクトを生成されたものの、Canvas外に生成されてしまった。
なので、第二引数に親を指定してあげる。UIの場合はRectTransformを指定すればOKだ。
using System.Collections;
using System.Collections.Generic;
using UnityEngine;
//インスタンスを管理するクラス
public class InstantiateManager : MonoBehaviour
{
public GameObject player;
public Transform parent;
//UI
public GameObject childText;
public RectTransform parentPanel;
void Start()
{
//子テキストの生成
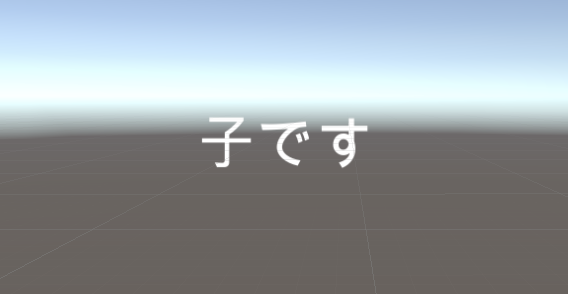
Instantiate(childText,parentPanel);
}
}
ちなみになぜ第二引数にRectTransformを指定できるのかというと、RectTransformがTransformを継承しているからだ。

③Instantiate(object,parent,bool)
3つ目は、2つ目に関連するInstantiateメソッドで、引数の3つ目にtrueかfalseを入れて使用する。

この関数の3つめの引数にtrueを入れると、生成されるオブジェクトをワールド座標の位置で表示させることができる。
ワールド座標とローカル座標とは?
・ワールド座標はシーンの原点からの座標のこと。(X,Y,Zが全て0の点が原点)
・ローカル座標は親のTransformから見た相対的な座標のこと。
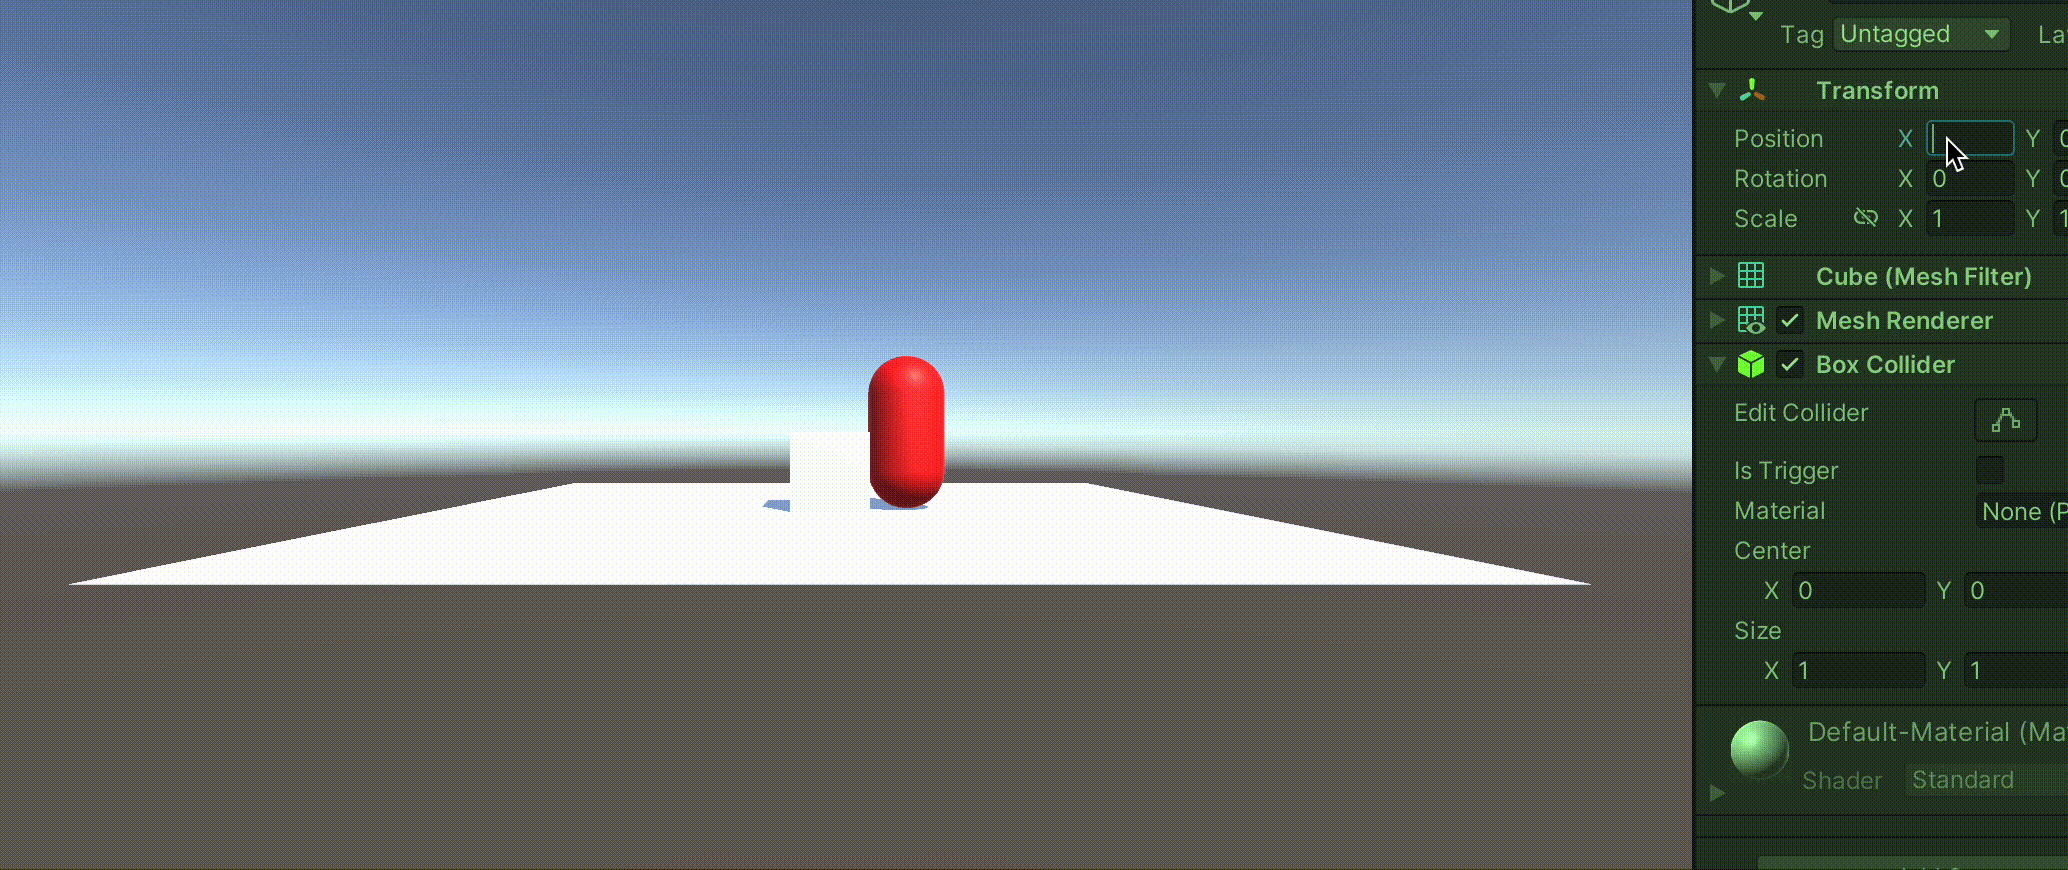
実際に第三引数にtrueを入れて例を見ていこう。
あらかじめ親オブジェクトを左に移動しておく。
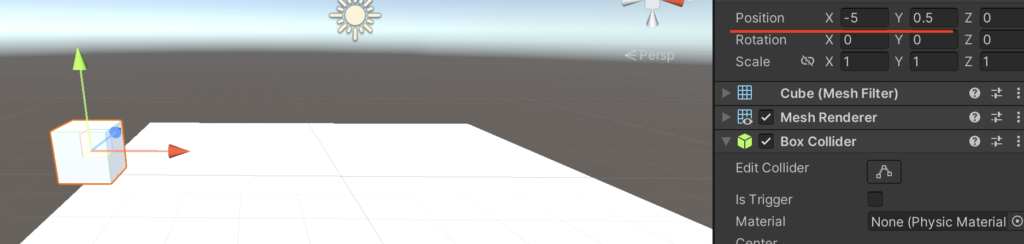
生成するプレハブのTransformをx,y(1,1)にしてみる。
前までであれば親を基準に位置が変わるはずだったが、このまま再生してみると子が原点に近い位置に表示されたはずだ。
子のTransformを見てみるとXが6でYが0.5になっている。
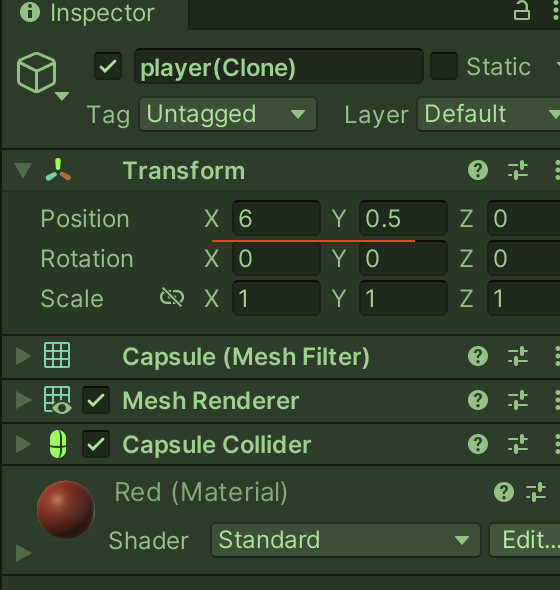
なぜ生成されたオブジェクトのTransformが変更されているかというと、第三引数にtrueを入れたのでワールド座標を基準にオブジェクトが生成されるからだ。つまり、原点(X0,Y0)から(X1,Y1)の地点にオブジェクトが生成されるので、親オブジェクトから見た際には、親オブジェクトの座標に子オブジェクトの座標を足したものが表示されるというわけだ。
シンプルにtrueを入れたら原点(0,0)からの位置に生成されると覚えておけばよい。
ちなみにここでは例を省略するが、UIの場合も同じ動き方になる。
どうしてもワールド座標にしたいって時はこのInstantiateメソッドを使用しよう。
ローカル座標に生成したい場合はわざわざ第三引数にfalseを入れる必要はなく、2番目に紹介したInstantiateメソッドを使用すればOKだ。
④Instantiate(Object,Vector3,Quaternion)
次は4つめの関数。これはよく本などで紹介されているメソッドだ。

これは第二引数に生成させたい場所を指定することで任意の場所にオブジェクトを生成させることができるものだ。また、第三引数でそのオブジェクトの回転を指定することができる。
以下のスクリプトを作成して再生してみる。
using System.Collections;
using System.Collections.Generic;
using UnityEngine;
//インスタンスを管理するクラス
public class InstantiateManager : MonoBehaviour
{
public GameObject player;
//public Transform parent;
void Start()
{
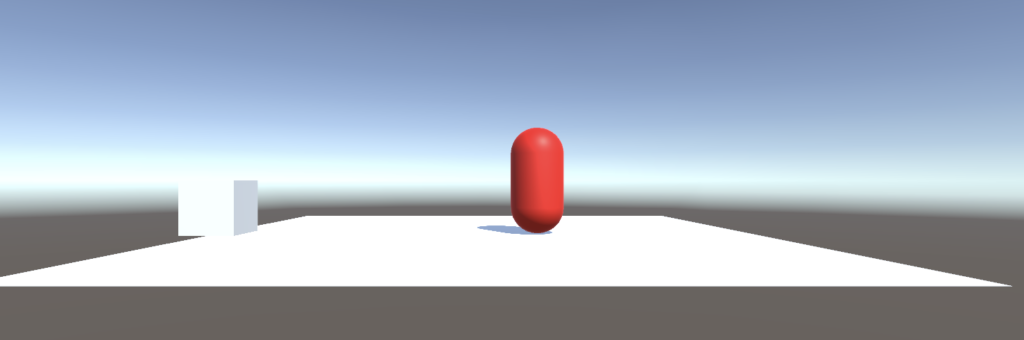
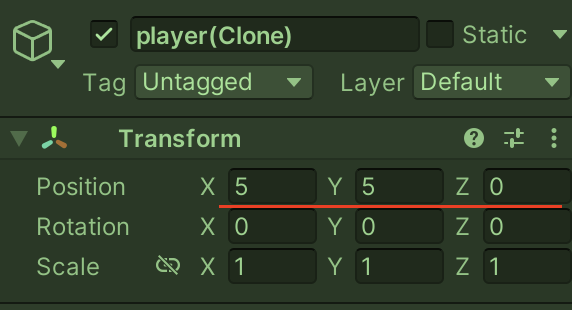
Vector3 capsulePosition = new Vector3(5.0f, 5.0f, 0); //生成したい位置を指定
Instantiate(player, capsulePosition, Quaternion.identity);
}
}
positionをX5、Y5に設定したのでその通り設定されている。
Vector3に関してよくわからなければこちらが参考になる。
https://ekulabo.com/whats-vector3
Quaternionはよくわかっていない。Quaternion.identityとしておけば、回転しなくて済むらしい。
⑤Instantiate(Object,Vector3,Quaternion,Transform)
最後は上で紹介した関数の4番目の引数にTransform型を入れることで親を指定することができるもの。
ただし、生成位置は親のTransformからのローカル位置ではなく、第三引数に指定したpositionの場所になる。

4番目と5番目で紹介したメソッドは主に3Dオブジェクトを使う時に使用するかも。
UIで使うなら親を指定する2番目のメソッドが多いかもしれない。
プレハブをGameObject以外で受け取る
ここまでプレハブは全てGameObject型で受け取ってきたが、もちろんPrefabに任意のスクリプトをくっつけて、その型で受け取ることもできる。むしろ、GameObjectで受け取るよりこちらの方が多いかもしれない。
playerプレハブにplayerスクリプトをアタッチしてみる。
Playerスクリプトにはstring型の変数を用意した。
using System.Collections;
using System.Collections.Generic;
using UnityEngine;

public class Player : MonoBehaviour
{
    public string playerName;
}
アタッチしたら、InstantiateManagerスクリプトを書き換える。
using System.Collections;
using System.Collections.Generic;
using UnityEngine;
//インスタンスを管理するクラス
public class InstantiateManager : MonoBehaviour
{
public Player player; //GameObject型からPlayer型に変更
public Transform parent;
void Start()
{
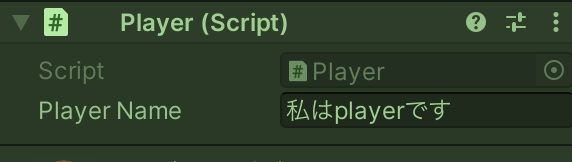
Player obj = Instantiate(player);
obj.playerName = "私はplayerです";
}
}public Player player;の部分が前のpublic GameObject player;からの変更点だ。
Player obj = Instantiate(player);で生成したオブジェクトをPlayer型で受け取り、その後にobj.playerName = "私はplayerです";とPlayerクラスの変数に文字を入れた。インスペクタで値が渡ったことを確認できるはずだ。
公式にも「コンポーネントのクローンを作成している場合は、コンポーネントがアタッチされているGameObjectもクローンされ、オプションの位置と回転が使用されます。」と記載されている。

つまり、GameObject型で受けっとってからGetComponent等を一々呼ぶ必要がないということだ。
よく参考記事などをみるとas GameObject 等として型変換しているが、今は勝手に型変換されて返されるから明示的なキャストをする必要がないらしい。また、それがリファレンスに反映されていないらしいので、わざわざ型変換する必要がないことにも注意しよう。
まとめ
- Instantiate(Object)でプレハブのインスタンスを生成する。生成位置はプレハブのTransform基準。
- Instantiate(Object,Transform)で親を指定することができる。
- Instantiate(Object,Transform,bool)で生成するオブジェクトをワールド座標に生成するか決められる。
- Instantiate(Object,Vector3,Quaternion)で生成位置と回転を決められる。
- Instantiate(Object,Vector3,Quaternion,Transform)で親を指定できる。生成される場所は指定した場所。
- UIの場合、4,5番目はあまり使わないかも。(人による)
- アタッチされているコンポーネントをInstantiateするとGameObjectもクローンされる。明示的に型変換をする必要はない。
こんなとこだろうか。きっちり違いを分かった上でInstantiateメソッドを使いこなしていきたい。