
UnityでFirestoreの記事を以前書いたので、今回はFirestoreへデータを書き込む方法と読み込む方法を見ていく。
なお、UnityでFirestoreを使えるようにしていることと、Firestoreの概念(コレクションやドキュメントなど)が大雑把にわかっていることを前提にしています。
UnityにFirestoreを入れてない人はこちらを参考にどうぞ

Firebaseのコンソール画面等の見方はこちら

Firestoreのデータモデルは公式がわかりやすい!
【公式サイト】https://firebase.google.com/docs/firestore/data-model?authuser=2
Firestoreへデータの書き込む
まずは、Firestoreへデータを書き込む。基本的には公式を参照しながら実践していく。
【公式サイト】https://firebase.google.com/docs/firestore/manage-data/add-data?authuser=2
とりあえず、以下のような関数を作ってStart関数ででも呼んであげる。
using System.Collections.Generic;
using Firebase.Extensions;
using Firebase.Firestore;
using UnityEngine;

  public void PushFirestoreData()
    {
        //Firestoreを使えるようにする
        var db = FirebaseFirestore.DefaultInstance;
        //Referenceを取得
        DocumentReference docRef = db.Collection("zoo").Document("elephant");
        //どんなデータを作るか決める
        Dictionary<string, object> data = new Dictionary<string, object>
        {
                { "name", "hanako" },
        };
        //上で作ったデータをFirestoreへと送る
        docRef.SetAsync(data).ContinueWithOnMainThread(task =>
        {
            Debug.Log("データが追加されました");
        });
    }
一つずつ見ていこう。
まずは名前空間の以下の部分、これはFirestoreを使うには必須のものでおまじないだと覚えておこう。
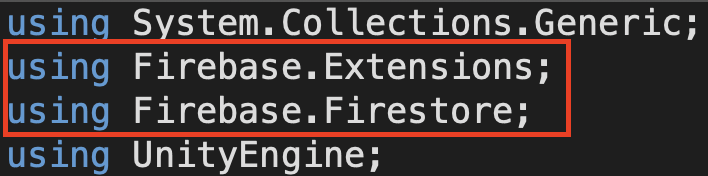
これは名前空間というもので、これを書くことで、Firestoreを使う時にコードを冗長に各必要がなくなる。
下の赤枠で囲んだところが今回Unityで使おうとしている部分だ。これを先にusingで書いておくと、この名前空間以下のメソッドなどを省略して書くことができる。
また、TaskExtensionはUnityのSystem.Threading.Tasks.TaskとSystem.Threading.Tasks.Task<T>を拡張してくれるものらしい。とりあえず入れておく必要がある。
次は、Firestoreを使えるようにするもの、Firestoreのインスタンスを呼び出して変数に入れる。意味わからなくても、これもおまじないだと思っておこう。
//Firestoreを使えるようにする
var db = FirebaseFirestore.DefaultInstance;
ちなみにもし、usingでFirebase.Firestoreを書いていなかった場合は以下のように書かなきゃいけない。一々こう書くのはめんどくさいからusingで指定しているわけだ。
//名前空間を宣言指定いない場合
var db = Firebase.Firestore.FirebaseFirestore.DefaultInstance;
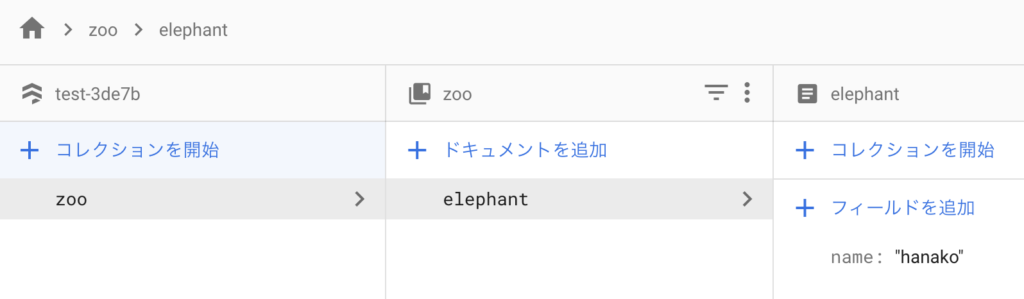
次にFirestoreのリファレンスを取得。ここで、コレクション名とドキュメント名を指定してる。上で作ったFirestoreのインスタンスから、(この場合変数db)、呼ぶことができる。
コレクションやドキュメントといったFirestoreの概念は必ず押さえておこう。ここでは、コレクション名をzooに、ドキュメント名をelephantとした。
//Referenceを取得
 DocumentReference docRef = db.Collection("zoo").Document("elephant");
次は実際に、どういうデータをFirestoreに送るのか、その中身を作る。これは、UnityというかC#の記法かな?別にFirestore関係なく、Dictionary型のデータを作成する。keyと値でデータを作成しよう。
//どんなデータを作るか決める
Dictionary<string, object> data = new Dictionary<string, object>
{
{ "name", "hanako" },
};
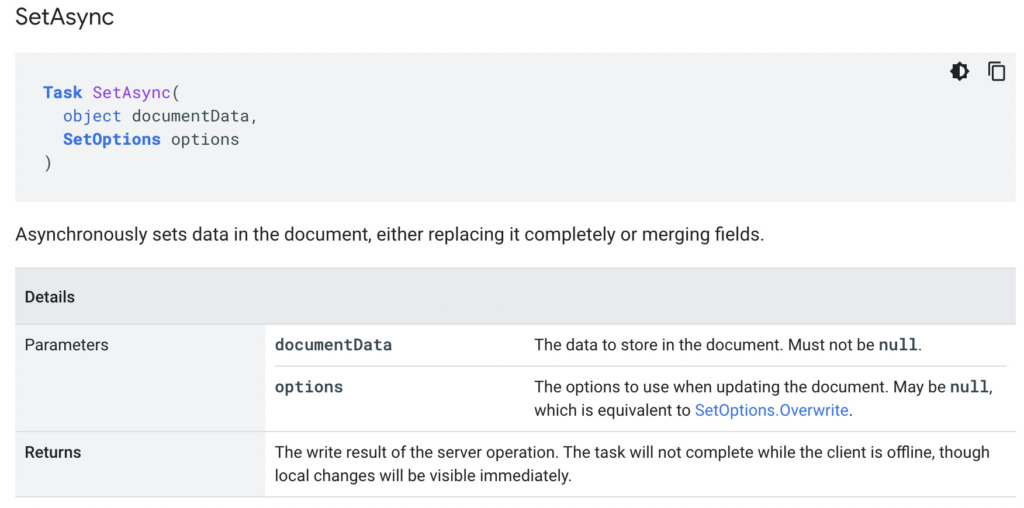
//keyがnameで値がhanakoここまでで下準備完了。いよいよ最後のこのコードでFirestoreへデータを書き込んでいる。
//上で作ったデータをFirestoreへと送る
        docRef.SetAsync(data).ContinueWithOnMainThread(task =>
        {
            Debug.Log("データが追加されました");
});指定したリファレンスdocRefからSetAsyncを呼び出す。SetAsyncの( )の中に上で作ったデータの変数(この場合data)を入れてあげるとそれが送られる。
これで、コレクション名がzooでドキュメント名がelephantとして、その中にデータを作成できた。
ちなみにドキュメントに名前をつけなかったら、ランダムなidがドキュメント名になる。


コレクション名は必ず指定する必要があるので気をつけよう。

上書きされないようにする
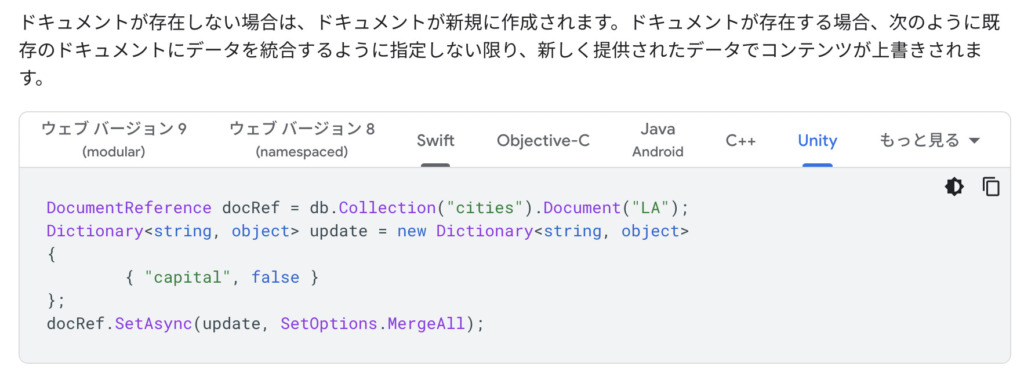
ここで一つ注意しておく必要があるのが、Firestoreのデータを上書きしないようにすることだ。公式にもある通り、もしドキュメントが存在しなければ新しく、ドキュメントが存在するならデータを上書きするということだ。
以下のコード、データのvalue部分をhanakoからtaroへと変更した。ドキュメントには上で作成しているelephantドキュメントを指定してある。
public void PushFirestoreData()
    {
        //Firestoreを使えるようにする
        var db = FirebaseFirestore.DefaultInstance;
        //Referenceを取得
        DocumentReference docRef = db.Collection("zoo").Document("elephant");
        //どんなデータを作るか決める
        Dictionary<string, object> data = new Dictionary<string, object>
        {
                { "name", "taro" },
        };
        //上で作ったデータをFirestoreへと送る
        docRef.SetAsync(data).ContinueWithOnMainThread(task =>
        {
            Debug.Log("データが追加されました");
        });
    }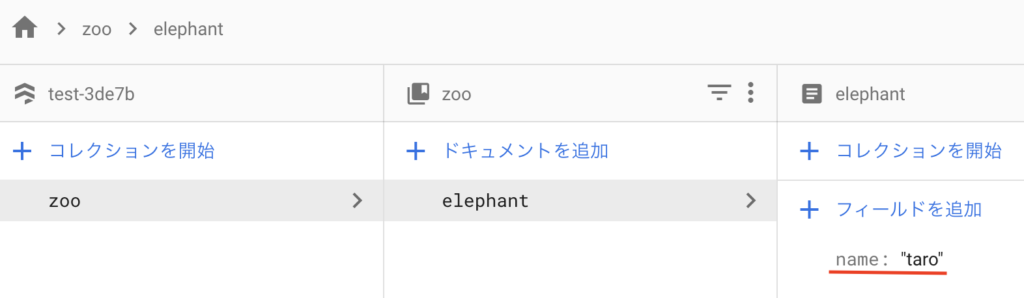
このようにドキュメントを指定して、データを新しく送ると上書きされてしまう。なので、データの上書きを防ぐにはオプションをつけてあげよう。
SetAsyncメソッドの第二引数にSetOptions.MergeAllを追加することで、データの上書きを防げる。
ただし、同じkeyの場合は結局上書きされるので注意が必要だ。
public void PushFirestoreData()
    {
        //Firestoreを使えるようにする
        var db = FirebaseFirestore.DefaultInstance;
        //Referenceを取得
        DocumentReference docRef = db.Collection("zoo").Document("elephant");
        //どんなデータを作るか決める
        Dictionary<string, object> data = new Dictionary<string, object>
        {
                { "name", "jiro" },
        };
        //上で作ったデータをFirestoreへと送る
        docRef.SetAsync(data,SetOptions.MergeAll).ContinueWithOnMainThread(task =>
        {
            Debug.Log("データが追加されました");
        });
}上のように、SetAsyncメソッドにSetOptions.MergeAllオプションをつけたとしても、keyにはnameが指定されているので、この場合は上書きされてしまう。

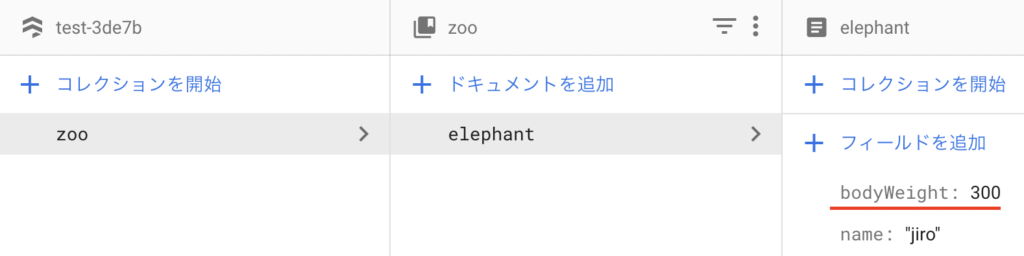
違うkeyを指定してあげて、SetOptions.MergeAllオプションをつけた場合は、前の値を残したまま新しくデータを付け足してくれる。コードでは体重を追加する。(ゾウの体重って300キロじゃ軽すぎ?)
public void PushFirestoreData()
    {
        //Firestoreを使えるようにする
        var db = FirebaseFirestore.DefaultInstance;
        //Referenceを取得
        DocumentReference docRef = db.Collection("zoo").Document("elephant");
        //どんなデータを作るか決める
        Dictionary<string, object> data = new Dictionary<string, object>
        {
                { "bodyWeight", 300 },
        };
        //上で作ったデータをFirestoreへと送る
        docRef.SetAsync(data,SetOptions.MergeAll).ContinueWithOnMainThread(task =>
        {
            Debug.Log("データが追加されました");
        });
}上のように、新しいkeybodyWeightを指定してSetOptions.MergeAllオプションをつけてあげると、前のデータを残したまま新しく項目が追加される。
AddAsync
実は、データの書き込みにはもう一つ方法がある。それは、AddAsyncメソッドを使用することだ。


ただし、これはDocumentReferenceから呼ぶことはできず、CollectionReferenceから呼んでくる必要がある。
public void PushFirestoreData()
    {
        //Firestoreを使えるようにする
        var db = FirebaseFirestore.DefaultInstance;
        //Referenceを取得
        CollectionReference colRef = db.Collection("zoo");
        //どんなデータを作るか決める
        Dictionary<string, object> data = new Dictionary<string, object>
        {
                { "name", "sabro" },
        };
        //上で作ったデータをFirestoreへと送る
        colRef.AddAsync(data).ContinueWithOnMainThread(task =>
        {
            Debug.Log("データが追加されました");
        });
}CollectionReferenceを取得しそこからAddAsyncメソッドを呼ぶことで、Firestoreに以下のようにデータが書き込まれる。

つまり、これは
 DocumentReference docRef = db.Collection("zoo").Document();
docRef.SetAsync(data)
と
colRef.AddAsync(data)が同じ働きをするということだ。
ドキュメント名がランダムな文字列でいい場合は、CollectionReferenceから直接AddAsyncメソッドを呼んできてもいいし、ドキュメントを空にして、SetAsyncメソッドを使用してもよい。
データを更新する
次はドキュメントの一部を更新する場合だ。全部を書き換えるなら、SetAsyncで事足りるが、フィールドの一部を変更したい場合はUpdateAsyncを使おう。(※上であげたように同じkeyを指定すれば、SetAsyncとSetOptions.MergeAllを使ってもできる)
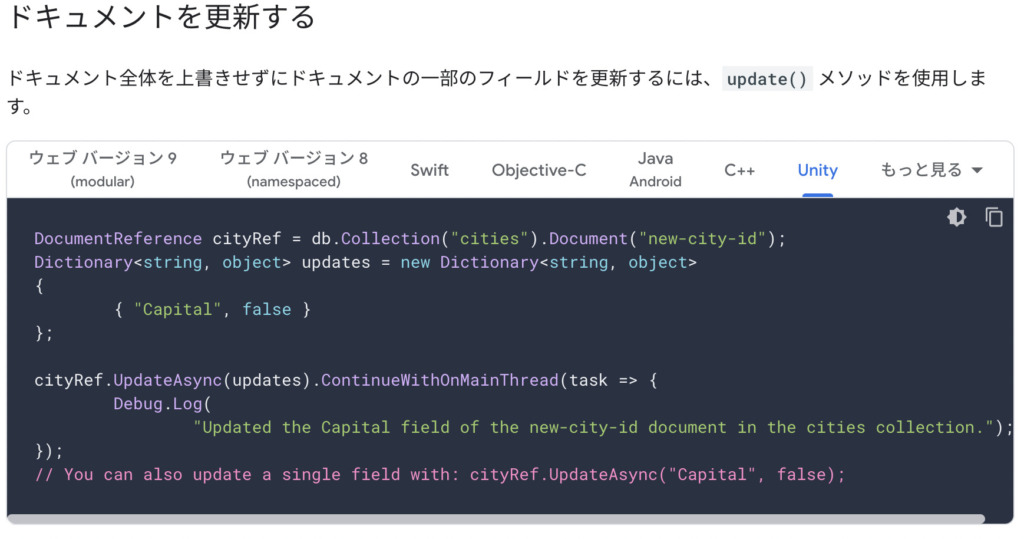
keyのbodyWeightの値をUpdateAsyncを使って3000から10000に変更してアプデしてみる。
public void PushFirestoreData()
    {
        //Firestoreを使えるようにする
        var db = FirebaseFirestore.DefaultInstance;
        //Referenceを取得
        DocumentReference docRef = db.Collection("zoo").Document("elephant");
        //どんなデータを作るか決める
        Dictionary<string, object> data = new Dictionary<string, object>
        {
                { "bodyWeight", 10000 },
        };
        //上で作ったデータをFirestoreへと送る
        docRef.UpdateAsync(data).ContinueWithOnMainThread(task =>
        {
            Debug.Log("データが追加されました");
        });
    }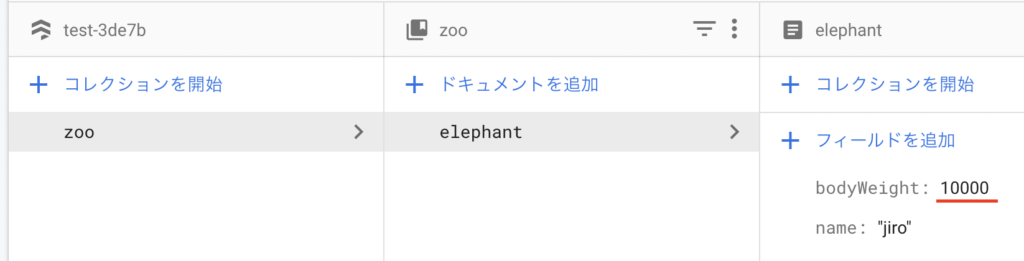
無事にbodyWeightが更新された。
オブジェクトの更新
FirestoreはNoSQLと呼ばれる構造をしているので、値にはどんな値も書き込める。
例えば、MySQLみたいにこのカラムにはint(数字)しか入れられないとかではなく、nameの値はstring、ageの値はintみたいな形で型が自由だ。だから、値にオブジェクトを書き込むこともできる。
ここでは公式のコードを切り出しながら、一緒に見ていきたい。
//Firestoreを使えるようにする
var db = FirebaseFirestore.DefaultInstance;
DocumentReference frankDocRef = db.Collection("users").Document("frank");
Dictionary<string, object> initialData = new Dictionary<string, object>
{
        { "Name", "Frank" },
        { "Age", 12 }
};

Dictionary<string, object> favorites = new Dictionary<string, object>
{
        { "Food", "Pizza" },
        { "Color", "Blue" },
        { "Subject", "Recess" },
};
initialData.Add("Favorites", favorites);
frankDocRef.SetAsync(initialData).ContinueWithOnMainThread(task => {

});
上のコードを実行すると、Firestoreに以下のようなデータが作成される。
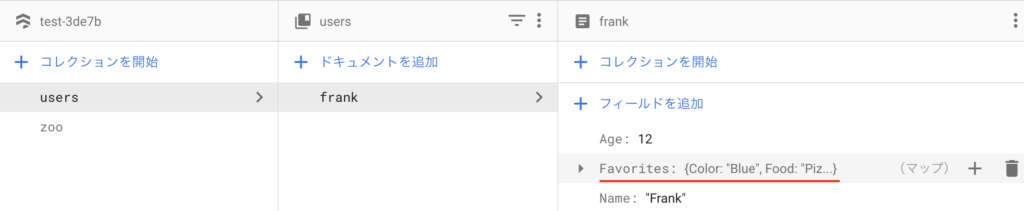
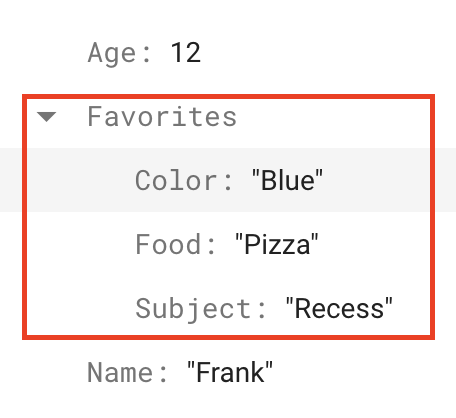
図のように、値にオブジェクトを追加することも可能だ。
Dictionary<string, object> initialData = new Dictionary<string, object>
{
        { "Name", "Frank" },
        { "Age", 12 }
};
ここで、keyNameとAgeを用意した後に、
Dictionary<string, object> favorites = new Dictionary<string, object>
{
        { "Food", "Pizza" },
        { "Color", "Blue" },
        { "Subject", "Recess" },
};
initialData.Add("Favorites", favorites);
frankDocRef.SetAsync(initialData).ContinueWithOnMainThread(task => {

});新しくオブジェクト型を用意して、initialData.Add("Favorites", favorites);コマンドで上のデータにオブジェクト型を追加する。
最後にfrankDocRef.SetAsync(initialData)でFirestoreにデータを書き込んだらオブジェクト型のデータも作成することができる。
そして、このオブジェクトの一部だけを更新することもできる。
さいど以下に公式からコードを引用してくる。
DocumentReference frankDocRef = db.Collection("users").Document("frank");
Dictionary<string, object> initialData = new Dictionary<string, object>
{
        { "Name", "Frank" },
        { "Age", 12 }
};

Dictionary<string, object> favorites = new Dictionary<string, object>
{
        { "Food", "Pizza" },
        { "Color", "Blue" },
        { "Subject", "Recess" },
};
initialData.Add("Favorites", favorites);
frankDocRef.SetAsync(initialData).ContinueWithOnMainThread(task => {

        // Update age and favorite color
        Dictionary<string, object> updates = new Dictionary<string, object>
        {
                { "Age", 13 },
                { "Favorites.Color", "Red" },
        };

        // Asynchronously update the document
        return frankDocRef.UpdateAsync(updates);
}).ContinueWithOnMainThread(task => {
        Debug.Log(
                "Updated the age and favorite color fields of the Frank document in "
                + "the users collection.");
});
追加されたコードはここの部分
frankDocRef.SetAsync(initialData).ContinueWithOnMainThread(task => {

        Dictionary<string, object> updates = new Dictionary<string, object>
        {
                { "Age", 13 },
                //FavoriteオブジェクトのカラーをBlueからRedに更新
                { "Favorites.Color", "Red" },
        };
        return frankDocRef.UpdateAsync(updates);
}).ContinueWithOnMainThread(task => {

});SetAsync(initialData)の後で、再度Dictionary型のデータを作成して、その後にUpdateAsyncでデータを更新しているだけだ。ポイントは{ "Favorites.Color", "Red" },の部分。
Favorites.Colorで、FavoritesオブジェクトのkeyであるColorを指定してある。オブジェクトの後にcを指定するとそのフィールドを参照することができる。

書き込みまとめ
- SetAsyncメソッドを使ってFirestoreにデータを書き込む。
- 同じドキュメントを指定している場合、以前のデータは上書きされる。
- SetOptions.MergeAllをつけることで上書きせずに、データを付け足す。(ただし、同じ名前のkeyは上書きされる。)
- フィールドの一部の値を変更するなら、UpdateAsyncメソッドを使おう。
- データの中にオブジェクト型があって、その中の一部を変更するなら
.(ドット)を使用しよう。
書き込みはこんなとこだろうか。
基本的には最初に書き込む時はSetAsyncやAddAsyncと更新すル時はUpdateAsyncを使ってFirestoreにデータを書きこんでみよう。
Firestoreからデータを取得する
お次はFirestoreからデータを取得してくる方法を見ていこう。
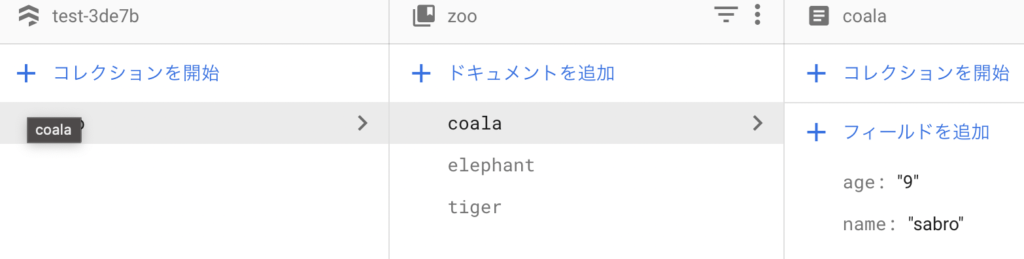
Firestore側にまず取得するべきデータを用意しよう。メソッドで書き込んでもいいし、Firestoreのコンソール画面から直接書き込んで作成してもよい。
とりあえず以下のようなデータを作成した。
ここからデータを取得しよう。取得する方法も単一のドキュメントを取得する方法とコレクション全体を取得してくる方法の2つがある。
単一のドキュメントを取得
まずは、単一のドキュメントを取得する方法から。
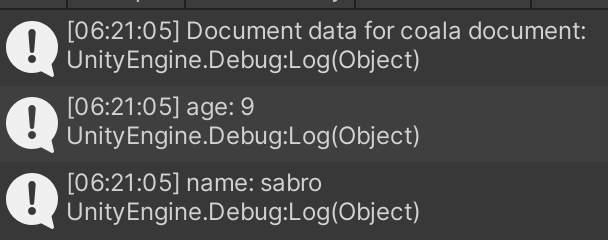
//ドキュメントからデータを取得する
        docRef.GetSnapshotAsync().ContinueWithOnMainThread(task =>
        {
            DocumentSnapshot snapshot = task.Result;
            //ドキュメントが存在すれば
            if (snapshot.Exists)
            {
                Debug.Log(String.Format("Document data for {0} document:", snapshot.Id));
                Dictionary<string, object> city = snapshot.ToDictionary();
                foreach (KeyValuePair<string, object> pair in city)
                {
                    Debug.Log(String.Format("{0}: {1}", pair.Key, pair.Value));
                }
            }
            //ドキュメントが存在しなければ
            else
            {
                Debug.Log(String.Format("Document {0} does not exist!", snapshot.Id));
            }
});ドキュメントからデータを取得するには、GetSnapshotAsyncメソッドを使う。
Firestoreでは、データを取得すると、DocumentSnapshotというものまとめられる。このあたりは色々な記事を参考にすれば理解が深まると思う。
とりあえず、DocumentSnapshotにデータが入っているということさえ押さえておく。
以下では、DocumentSnapshotを取得して、その変数snapshotからExistsを呼んでドキュメントがあるかどうかを確認している。
DocumentSnapshot snapshot = task.Result;
            //ドキュメントが存在すれば
            if (snapshot.Exists)
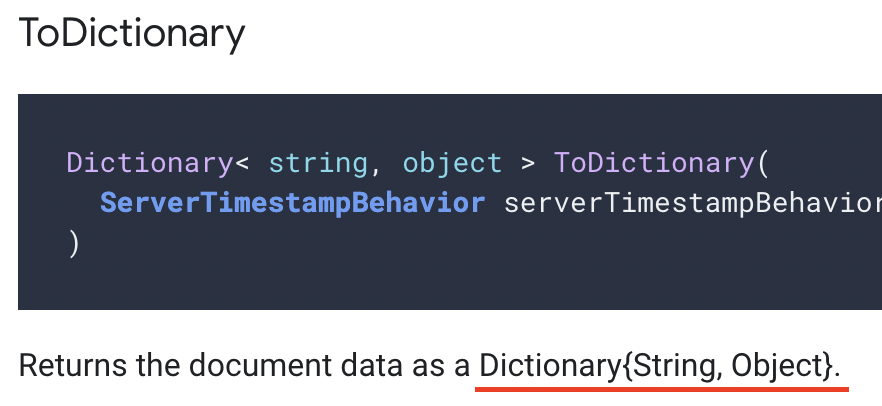
ドキュメントが存在すれば、ToDictionaryメソッドでDictionary型にして後はそれを展開しているだけだ。
 Dictionary<string, object> city = snapshot.ToDictionary();
                foreach (KeyValuePair<string, object> pair in city)
                {
                    Debug.Log(String.Format("{0}: {1}", pair.Key, pair.Value));
                }
ちなみに、公式ではDictionary型にして展開しているが、DocumentSnanpshotクラスには他にも、GetValueメソッドがあるのでお好きな方法でデータを取ってこよう。
コレクションを取得
次は、ドキュメントを指定するのではなく、コレクション全体を取得してくる方法をみる。
以下のコードで
public void GetFirestoreData()
{
//Firestoreを使えるようにする
var db = FirebaseFirestore.DefaultInstance;
Query allZooQuery = db.Collection("zoo");
allZooQuery.GetSnapshotAsync().ContinueWithOnMainThread(task =>
{
QuerySnapshot allZooQuerySnapshot = task.Result;
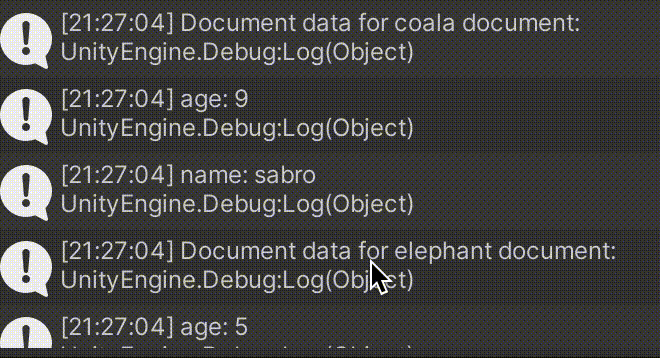
foreach (DocumentSnapshot documentSnapshot in allZooQuerySnapshot.Documents)
{
Debug.Log(String.Format("Document data for {0} document:", documentSnapshot.Id));
Dictionary<string, object> zoo = documentSnapshot.ToDictionary();
foreach (KeyValuePair<string, object> pair in zoo)
{
Debug.Log(String.Format("{0}: {1}", pair.Key, pair.Value));
}
}
});
}コレクション内のドキュメントを全て取得することができる。
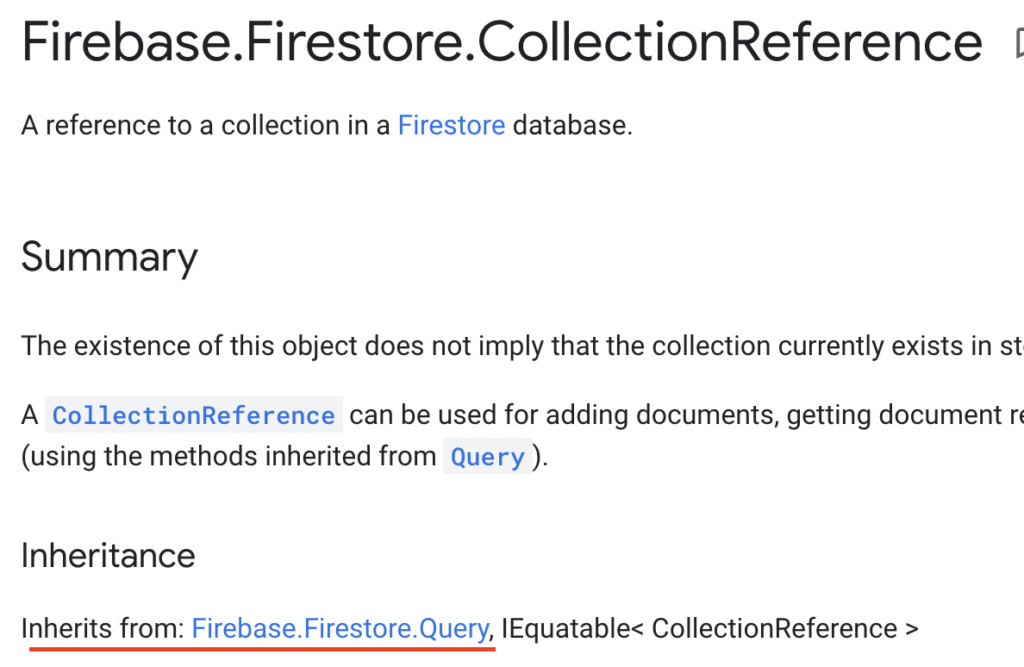
注目するところは、Queryクラス。以下のコードの中で、db.Collection("zoo")をCollectionReferenceではなく、Queryクラスで取得している。
実はCollectionReferenceクラスはQueryクラスも継承しているので、Queryクラスでも受け取ることができる。
わざわざ、Queryクラスで受け取らなくたってって思ったかもしれないが、Queryクラスで受け取ることによって、GetSnapshotAsyncメソッドを呼んでくることができる。(CollectionReferenceにはGetSnapshotAsyncメソッドはない。)
Query allZooQuery = db.Collection("zoo");上はQueryクラスで受け取る
CollectionReference allZooQuery = db.Collection("zoo");上はCollectionReference

Queryクラスから、GetSnapshotAsyncメソッドを呼ぶと、QuerySnapshotという形でデータが返ってくる。この中に、Collectionの中にある全てのドキュメントが入っている。
QuerySnapshot allZooQuerySnapshot = task.Result;QuerySnapshotという形でデータが取得できる。
データを取得したら後は、QuerySnapshotクラスからDocumentsを呼んで、forEachでクルクル回してその中でデータを出力するだけだ。

foreach (DocumentSnapshot documentSnapshot in allZooQuerySnapshot.Documents)
            {
                Debug.Log(String.Format("Document data for {0} document:", documentSnapshot.Id));
                Dictionary<string, object> zoo = documentSnapshot.ToDictionary();
                foreach (KeyValuePair<string, object> pair in zoo)
                {
                    Debug.Log(String.Format("{0}: {1}", pair.Key, pair.Value));
                }
            }
Queryクラスから、データを取得したら、Where文などのクエリ機能を使って、条件を絞って欲しいデータだけを取得することもできる。こちらは、また別記事などでまとめられたら。
また、Firestore内のデータの変更を受け取るといったListnerといった概念もどこかで紹介したい。
読み込みまとめ
- DocumentReferenceを取得して、GetAsyncメソッドでデータを取得
- 全ドキュメントはコレクションから。Queryクラスで受け取れる
- Where文などを使って条件を指定できる
まとめ
書き込みと読み込みをここまで見てきた。ぶっちゃけこれさえできればFirestoreで色々できるだろう。後は触っていくうちに、もっと深いところまで理解していけるはずだ。(自分に言い聞かせる。)
ちなみに、本番環境にあげるには、セキュリティルールをしっかり構築する必要があるのであくまでテストや学習の初めとして感覚を掴めてもらえば幸いだ。